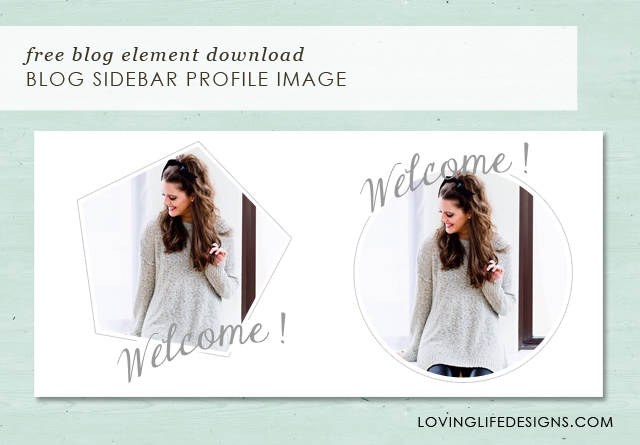
Today I have a free blog element for you to download, a sidebar profile image that you can personalize to match your blogs design.
To warn you this is a Photoshop PSD file. In order to personalize this element you MUST have Photoshop or Photoshop Elements. If you don't have Photoshop? We can edit it for you. Prices start at $10.
A sidebar profile says a lot about a blog and it's author. In just a few sentences it can tell your reader who you are, what the blog is about and why they should keep coming back. A great looking profile image can help draw a reader in and allow them to connect with you. I don't know about you but it's one of the first things I read when I scan a new blog.
Blogs are also about highlighting your personality and who you are as an author. It's why your readers come back time and time again. You're interesting, they like what you have to say, and they appreciate it. They want to get to know you and what you are doing. Having a generic uninteresting profile doesn't interest readers and it doesn't let them get to know your personality. Thats why I have given you the opportunity to personalize this image with your own colors and picture.
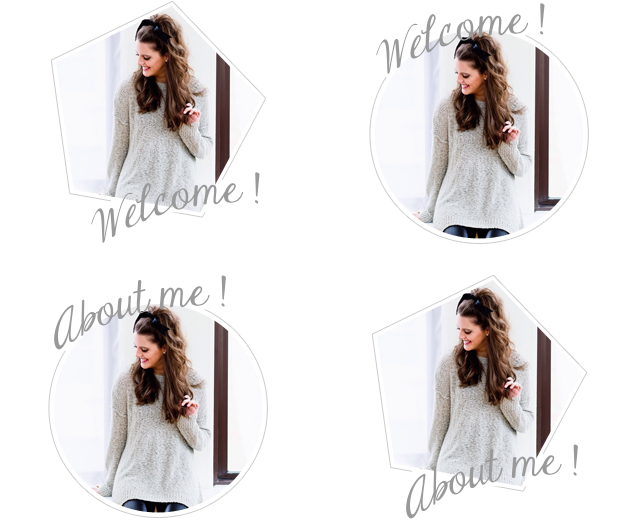
I have 4 different but similar designs for you to choose from. A pentagon and a circle. One says "Welcome!" and the other says "About me!". This file is super easy to personalize and I've provided a tutorial for you below.
My favorite is the pentagon that says Welcome! What's your favorite? - You can download the (FOR PERSONAL USE ONLY) PSD files below.
*Remember - Loving Life Designs downloads are for followers only. We ask that if you download our creations you become a follower. It only takes a second. Thanks.
Lets PERSONALIZE this THING!
In this tutorial I'll show you how to change the picture and colors to make this profile image perfect for you and your blog. We'll take your drab profile to turn it totally fab. (always wanted to use that in a blog post!)
How to Change the Profile Image.
I'll quickly walk you through these steps, but if you want detailed instructions on how to use a clipping mask in a loving life designs project you can read more about it in this tutorial I posted a couple months ago.
1. Navigate to the file you have stored your photo. I like to store a copy of my photo on my desktop. I think it makes it easier to locate.
2. Drag and place the image into the opened photoshop file.
3. Move you profile image layer just above the layer titled clipping mask.
4. Right click your image layer and select create clipping mask (or hold down the option key and click on your images layer). Doing this should constrain the image to the pentagons shape.
5. Resize your image to fit inside the pentagon.
How to change the Welcome/About me text color.
I did something pretty nifty to make this process easier for you. I converted the text to a shape so you don't have to worry about installing the font.
1. Start off by selecting the Welcome/About me shape.
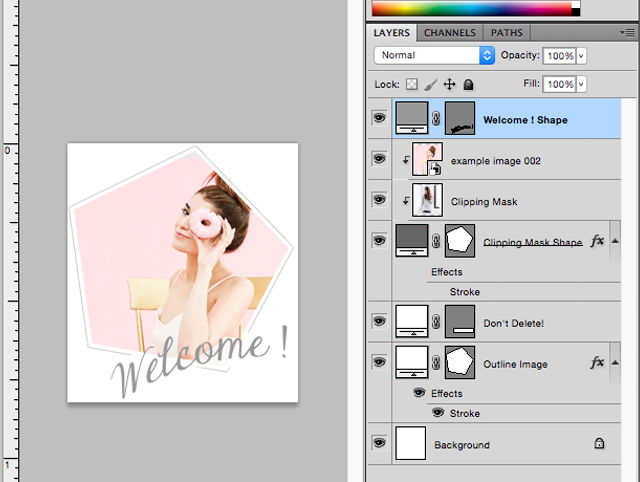
2. Double click the layer thumbnail.
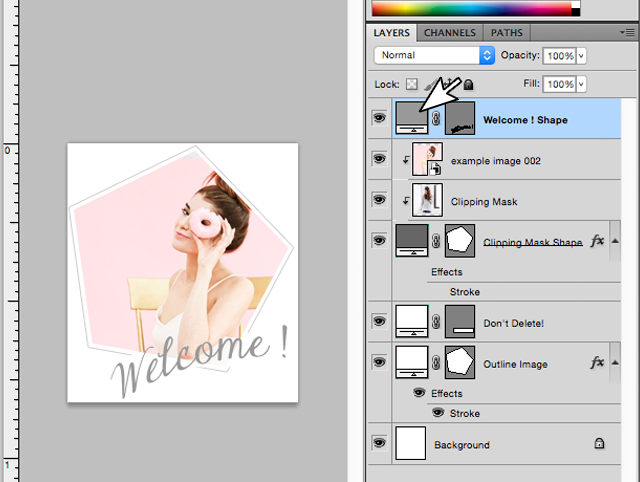
3. The color selector dialog box should open.
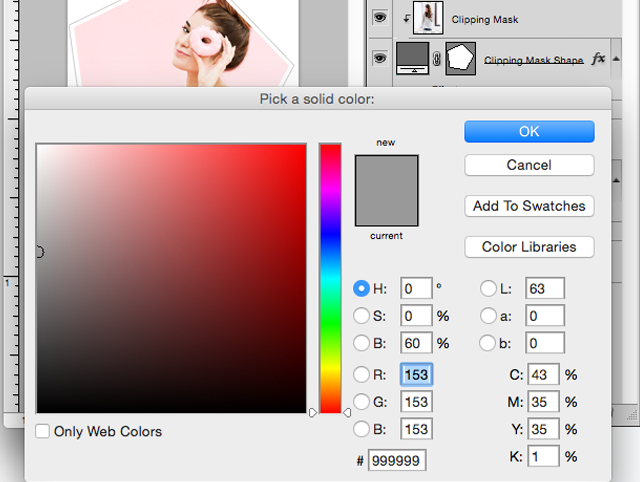
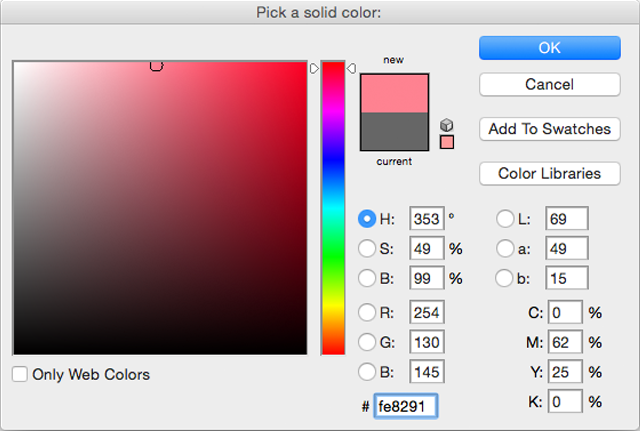
4. Pick a color or add a HEX number - I chose a nice pink to match my profile image - click okay. Done! Easy peasy lemon squeezy!
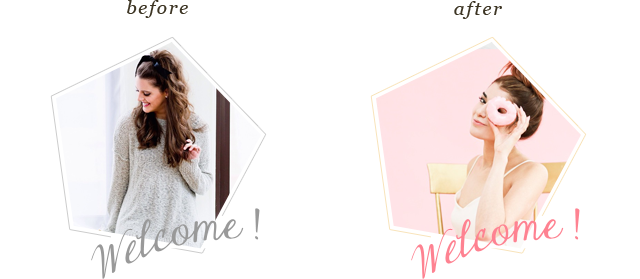
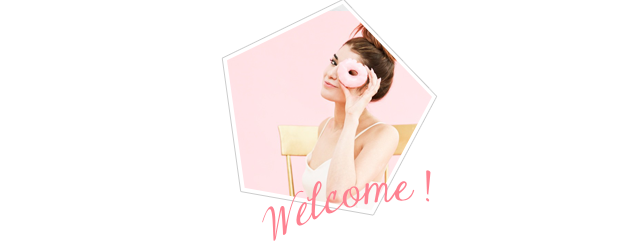
Half way there - So far we have changed the image and the color of the text. Does yours kind of look like this right now? You can stop now if you chose. The grey outline would be nice accent to this profile image.
How to Change the Outline Color
1. Select the Outline Image layer.
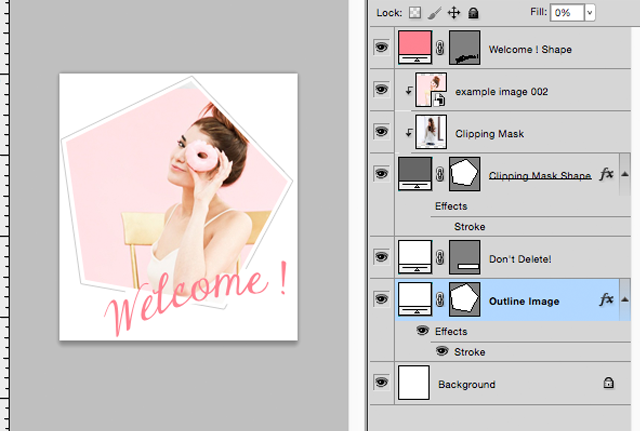
2. Double click the word stroke.
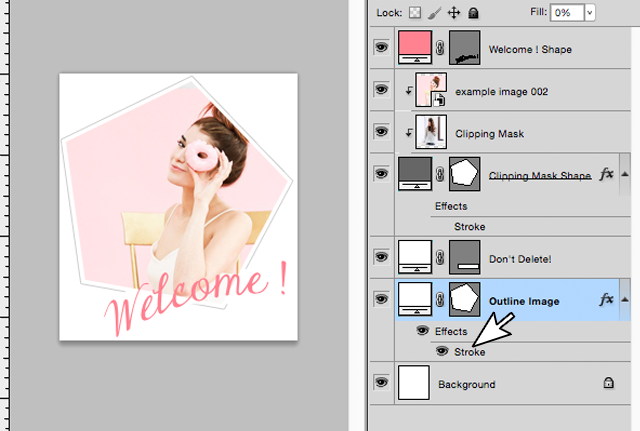
3. Click the grey box in the layer style dialog box.
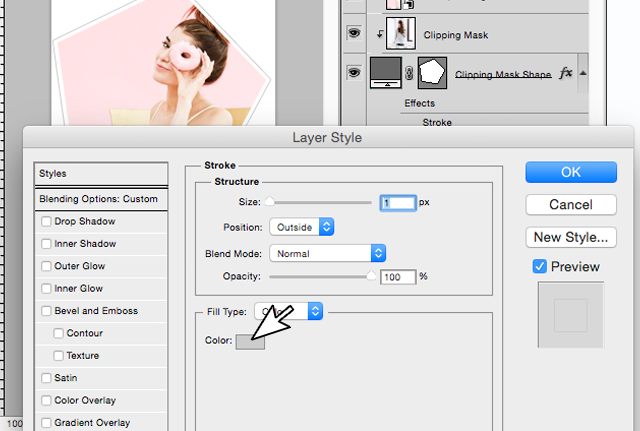
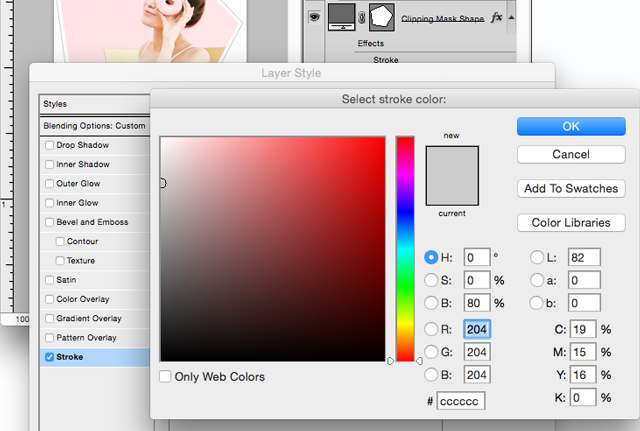
4. Pick a color or add a HEX number in the color selector dialog box. Then click okay and then okay again.
Viola You are done! Step back and admire your new sidebar profile image. Doesn't it look just FABULOUS?
I'll quickly walk you through these steps, but if you want detailed instructions on how to use a clipping mask in a loving life designs project you can read more about it in this tutorial I posted a couple months ago.
1. Navigate to the file you have stored your photo. I like to store a copy of my photo on my desktop. I think it makes it easier to locate.
2. Drag and place the image into the opened photoshop file.
3. Move you profile image layer just above the layer titled clipping mask.
4. Right click your image layer and select create clipping mask (or hold down the option key and click on your images layer). Doing this should constrain the image to the pentagons shape.
5. Resize your image to fit inside the pentagon.
How to change the Welcome/About me text color.
I did something pretty nifty to make this process easier for you. I converted the text to a shape so you don't have to worry about installing the font.
1. Start off by selecting the Welcome/About me shape.

2. Double click the layer thumbnail.

3. The color selector dialog box should open.

4. Pick a color or add a HEX number - I chose a nice pink to match my profile image - click okay. Done! Easy peasy lemon squeezy!

Half way there - So far we have changed the image and the color of the text. Does yours kind of look like this right now? You can stop now if you chose. The grey outline would be nice accent to this profile image.

How to Change the Outline Color
1. Select the Outline Image layer.

2. Double click the word stroke.

3. Click the grey box in the layer style dialog box.

4. Pick a color or add a HEX number in the color selector dialog box. Then click okay and then okay again.

Viola You are done! Step back and admire your new sidebar profile image. Doesn't it look just FABULOUS?
If you have any questions or comments please email us at lovinglifedesigns @ gmail.com or leave a comment on a post.
Thanks for reading.

