Showing posts with label Custom Blog Design. Show all posts

April 22, 2015

Free Blog Sidebar Profile Image Design
{Free Blog Element Download}


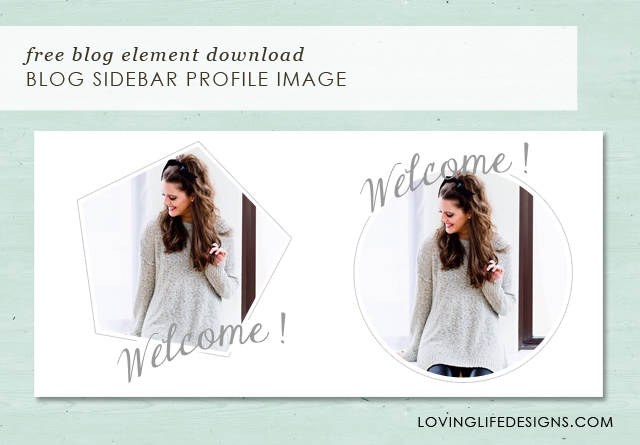
Today I have a free blog element for you to download, a sidebar profile image that you can personalize to match your blogs design.

To warn you this is a Photoshop PSD file. In order to personalize this element you MUST have Photoshop or Photoshop Elements. If you don't have Photoshop? We can edit it for you. Prices start at $10.

A sidebar profile says a lot about a blog and it's author. In just a few sentences it can tell your reader who you are, what the blog is about and why they should keep coming back. A great looking profile image can help draw a reader in and allow them to connect with you. I don't know about you but it's one of the first things I read when I scan a new blog.

Blogs are also about highlighting your personality and who you are as an author. It's why your readers come back time and time again. You're interesting, they like what you have to say, and they appreciate it. They want to get to know you and what you are doing. Having a generic uninteresting profile doesn't interest readers and it doesn't let them get to know your personality. Thats why I have given you the opportunity to personalize this image with your own colors and picture.

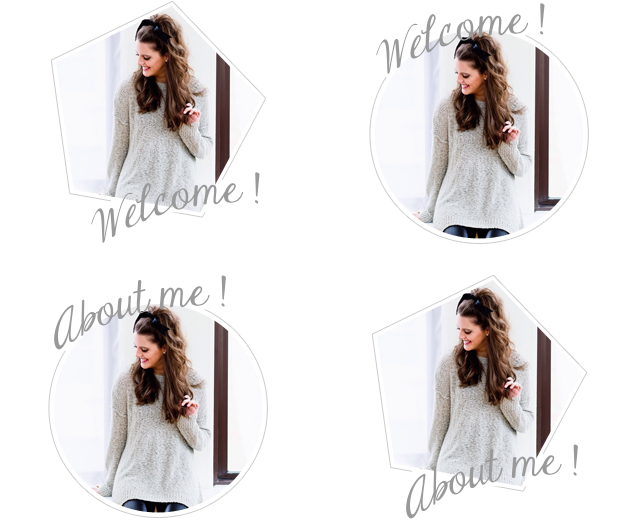
I have 4 different but similar designs for you to choose from. A pentagon and a circle. One says "Welcome!" and the other says "About me!".  This file is super easy to personalize and I've provided a tutorial for you below.

My favorite is the pentagon that says Welcome! What's your favorite? - You can download the (FOR PERSONAL USE ONLY) PSD files below.


*Remember - Loving Life Designs downloads are for followers only. We ask that if you download our creations you become a follower. It only takes a second. Thanks.


Lets PERSONALIZE this THING!

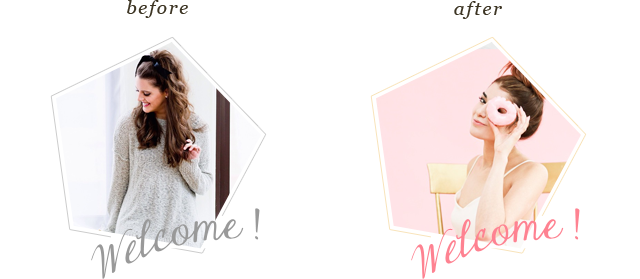
In this tutorial I'll show you how to change the picture and colors to make this profile image perfect for you and your blog. We'll take your drab profile to turn it totally fab. (always wanted to use that in a blog post!)


How to Change the Profile Image. 

I'll quickly walk you through these steps, but if you want detailed instructions on how to use a clipping mask in a loving life designs project you can read more about it in this tutorial I posted a couple months ago.

1. Navigate to the file you have stored your photo. I like to store a copy of my photo on my desktop. I think it makes it easier to locate.
2. Drag and place the image into the opened photoshop file.
3. Move you profile image layer just above the layer titled clipping mask.
4. Right click your image layer and select create clipping mask (or hold down the option key and click on your images layer). Doing this should constrain the image to the pentagons shape.
5. Resize your image to fit inside the pentagon.

How to change the Welcome/About me text color.

I did something pretty nifty to make this process easier for you. I converted the text to a shape so you don't have to worry about installing the font.

1. Start off by selecting the Welcome/About me shape.


2. Double click the layer thumbnail.


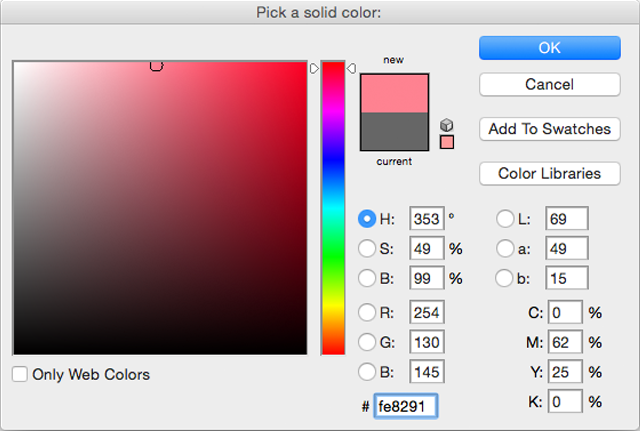
3. The color selector dialog box should open.


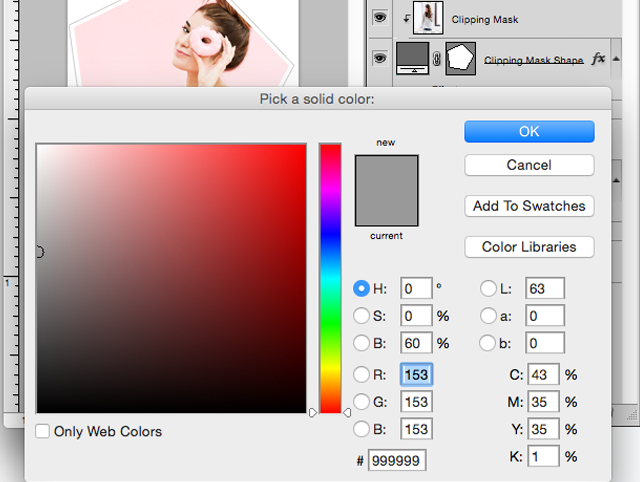
4. Pick a color or add a HEX number - I chose a nice pink to match my profile image - click okay. Done! Easy peasy lemon squeezy!


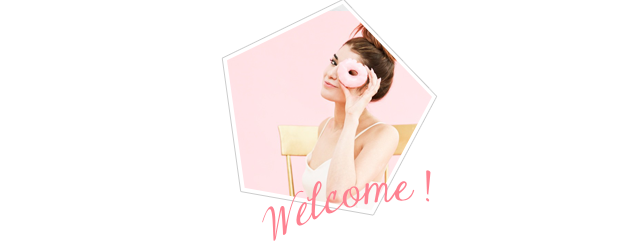
Half way there - So far we have changed the image and the color of the text. Does yours kind of look like this right now? You can stop now if you chose. The grey outline would be nice accent to this profile image.


How to Change the Outline Color

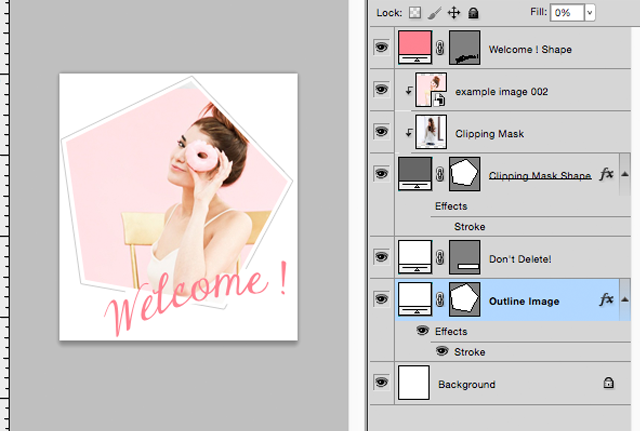
1. Select the Outline Image layer.


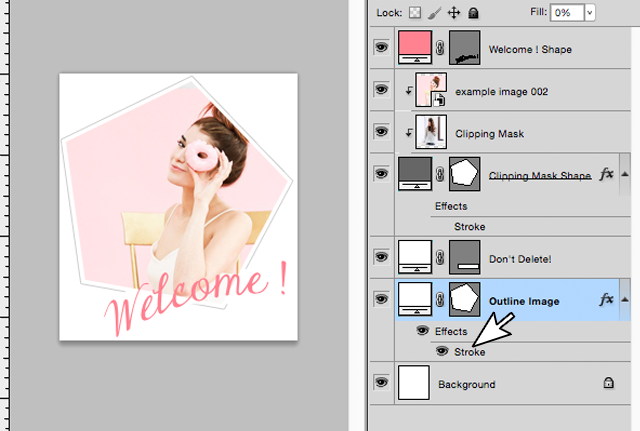
2. Double click the word stroke.


3. Click the grey box in the layer style dialog box.


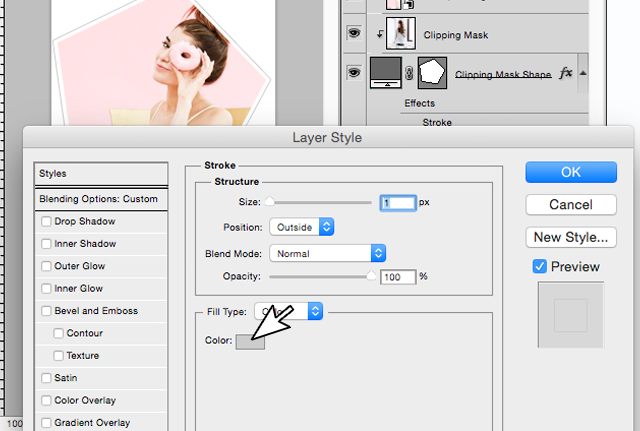
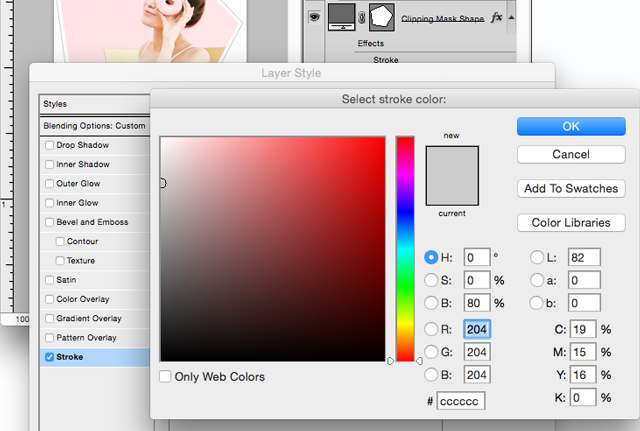
4. Pick a color or add a HEX number in the color selector dialog box. Then click okay and then okay again.


Viola You are done! Step back and admire your new sidebar profile image. Doesn't it look just FABULOUS?

If you have any questions or comments please email us at lovinglifedesigns @ gmail.com or leave a comment on a post.

Thanks for reading.

Creative Commons License

April 15, 2015

How to Remove & Hide Blogger Attribution Widget
{Blogger Tutorial}

Today I have another easy blogger tutorial for you and AGAIN it will take just 30 seconds to add to your blog code.

This tutorial is on how to remove the blogger attribution widget easily AND without frustration. I don't know about you but I have tried other tactics to delete it and that mean little widget keeps showing back up.

I have found that this method is the fastest, easiest and works 100%* of the time (*when I do it).

How to Remove & Hide Blogger Attribution Widget: A Blogger Tutorial

1. go to Dashboard > Template > Customize.
2. Click on Advanced.
3. Scroll to Add CSS.
4. Add the following code.
#Attribution1 { display:none; }
5. Make sure the Blogger attribute is gone in the preview window.
6. Click Apply to Blog.

Viola You are done!

What do you think? Are there any other tutorials you would like to see?

Creative Commons License

March 18, 2015

Premade Blogger Template
Radiant Orchid

This months featured premade blogger template is Radiant Orchid. I think my favorite part of this design is the color scheme. Purple is just so royal and rich. It's such an amazing color.

Lets dive into the design - Shall we?

Here is a closer look at the header. It's a bold, simple, classic san serif blog title paired with a cursive font.


The color scheme is monochromatic. You have a very deep royal purple, a bright lavender and then the "2014 color of the year" radiant orchid - see where the name comes from?


Here we have another bold but still super simple and oh so classic design. We used the title color for the font and continued the cursive from the header. I love that we incorporated the social media icons into the widget. Makes the sidebar seems less cluttered.


Radiant Orchid Template Features:
  • 2 column layout with right sidebar. 
  • Coordinating color scheme and custom google font pairings.
  • Matching custom header - with and optional tag line. 
  • Social Media Icons
  • Custom Search Widget
  • About Me/Welcome image.
  • Social Media Share widget below ALL posts. 
  • Stylized block quote. 
  • Custom Subscribe widget. 
  • Instagram and Pinterest widgets.  


What do you get when you order a Loving Life Designs premade Blogger template?

For starters this wouldn't be an instant download situation, where you have to install it all on your own. Loving Life Designs will install the template to make sure it turns out perfect and looks professional.

What else would you get with the purchase from Loving Life Designs?
  1. Install within 48 hours of purchase (keep in mind Loving Life Designs does not work on Sundays).
  2. The design exactly as it is shown - sorry no color or font edits. Any customizations (other than the header) will be extra.
  3. A custom edited header - as shown (we can talk about a different look). 
  4. A custom edited about me/profile widget picture. 
  5. Static page content customization - you provide the text and pictures - we'll style and design your static pages. 
  6. ALL widgets you want installed and edited to perfection by Loving Life Designs. (wanna add a Pinterest widget or a Facebook widget? no problem it's part of the design.)
  7. Social Media Icons - Installed and linked to your existing accounts. 
  8. Pretty much any edits that are needed to make this blog perfect for you and your readers. 


Creative Commons License

March 11, 2015

How to Remove & Hide Subscribe to Post Link in Blogger
{Blogger Tutorial}

Today I have a tutorial for you about hiding that annoying and design ruining link (unwanted text can always ruin the feel and flow of a design!) at the bottom of your blogger page.

There are two ways to get rid of this link. An easy way and a hard way.

The hard way has you deleting code and what not - I am not the biggest fan of deleting code if you don't have to. As a beginner you might delete something you don't intend to or won't delete enough and it's always super hard to figure out what the problem is. 

The easy way is just simply adding some CSS code to hide it.

Today I am going to show you the easy way. *REMEMBER - First download and backup your current tutorial!

This is another one of those 30 second blogger updates that can dramatically improve the look of your blog - Okay maybe not dramatically but it does make the link go away.

How to Remove & Hide Subscribe to Post link: A Blogspot Tutorial

1. Go to Dashboard > Template > Edit HTML.
2. A few lines down you'll find <b:skin>--</b:skin>

3. Click the arrow next to it to expand your blogs template code.
4. Add the FOLLOWING code just about the closing </b:skin> tag - make sure you place it before the entire closing tag - }]]></b:skin>.
.feed-links { display:none; }
5. Preview your template and make sure it worked.
6. Save your work.

Viola, you are now done!

Want an even easier way to add this code to your blog? Follow these SUPER easy instructions.

1. Go to Dashboard > Template > Customize.
2. Click on Advanced.
3. Scroll down to add CSS.
4. Add the ABOVE code in the box. See photo below.


5. Click Apply to Blog.

Thats it! All done!
Creative Commons License

February 18, 2015

Premade blogger template
Modern Chic

Today we want to share with you another one of our pre-made blog templates. I really like how this one looks. Super clean, simple and very "in" right now.  It's called Modern Chic.

It's a monochromatic color scheme of black. I love the black look on blogs right now. I also love the custom sidebar for the social media icons. We can also add pages to that area, if you want. The options are limitless with that code.


My favorite feature on the is blog is the share icons at the bottom of each post.

Elizabeth is a genius and created a code for it. So awesome! All pre-made blogs offer that custom share icon. 

See the demo at: lovinglifemodernchicdemo.blogspot.com

Modern Chic Template features:
  • 2 column layout with right sidebar.
  • Coordinating color scheme and custom font pairings.  
  • Matching social media icons.
  • Search widget with matching submit button.
  • Welcome/About me image.
  • Social Media Share widget below blog posts.
• • •

What do you get when you order a Loving Life Designs premade Blogger template?

For starters this wouldn't be an instant download situation, where you have to install it all on your own. Loving Life Designs will install the template to make sure it turns out perfect and looks professional.

What else would you get with the purchase from Loving Life Designs?
  1. Install within 48 hours of purchase (keep in mind Loving Life Designs does not work on Sundays).
  2. The design exactly as it is shown - sorry no color or font edits. Any customizations (other than the header) will be extra.
  3. A custom edited header - as shown (we can talk about a different look). 
  4. A custom edited about me/profile widget picture. 
  5. Static page content customization - you provide the text and pictures - we'll style and design your static pages. 
  6. ALL widgets you want installed and edited to perfection by Loving Life Designs. (wanna add a Pinterest widget or a Facebook widget? no problem it's part of the design.)
  7. Social Media Icons - Installed and linked to your existing accounts. 
  8. Pretty much any edits that are needed to make this blog perfect for you and your readers. 


Creative Commons License

January 12, 2015

Premade Blogger Template
Glitter + Glam

Today I want to share with you a new concept from Loving Life Designs: Premade Blogger Templates. Don't worry our free templates will still be available. In fact I should post a few new ones.

This template is called Glitter + Glam. It's got a pink and goldish color scheme. It's pretty chic - right? I'm kind of in love with it.

Here is a closer look at the header.


A better look at the color scheme.


and a detailed look at the About me/Welcome image


See the DEMO at lovinglifeglitterglamdemo.blogspot.com

Email us at lovinglifedesigns@gmail.com for more information - all transactions will be paid through Etsy.

My favorite part is the about me welcome image. I really like the thin inner border. What's your favorite part of the template?

Thanks for stopping by - Follow us here or like us on Facebook to keep updated on our new designs.


Glitter + Glam Template features:
  • 2 column layout with right sidebar.
  • Coordinating color scheme and custom font pairings. 
  • Matching custom designed header - with an optional tag line. 
  • Matching social media icons.
  • Search widget with matching submit button.
  • Welcome/About me image.
  • Social Media Share widget below blog posts.
  • Stylized block quote to match blog design.
• • •

What do you get when you order a Loving Life Designs premade Blogger template?

For starters this wouldn't be an instant download situation, where you have to install it all on your own. Loving Life Designs will install the template to make sure it turns out perfect and looks professional.

What else would you get with the purchase from Loving Life Designs?
  1. Install within 48 hours of purchase (keep in mind Loving Life Designs does not work on Sundays).
  2. The design exactly as it is shown - sorry no color or font edits. Any customizations (other than the header) will be extra.
  3. A custom edited header - as shown (we can talk about a different look). 
  4. A custom edited about me/profile widget picture. 
  5. Static page content customization - you provide the text and pictures - we'll style and design your static pages. 
  6. ALL widgets you want installed and edited to perfection by Loving Life Designs. (wanna add a Pinterest widget or a Facebook widget? no problem it's part of the design.)
  7. Social Media Icons - Installed and linked to your existing accounts. 
  8. Pretty much any edits that are needed to make this blog perfect for you and your readers. 

  Creative Commons License

December 29, 2014

Loving Life Designs Announcement
Custom Blogger Designs


Today we would like to take a moment and tell you about a new design service that we are bringing back. Okay, so it's an old service that we have not done it a while, how can it possibly be new? So it's not new but it's new again. I should stop.

The starting price is $100 and goes up from there. It most likely would never go above $175 or $200 it all depends on what you want.

What do you get for $100?
  • Custom Header
  • Background
  • Menu Bar
  • Three (3) Styled Stand Alone Pages
  • Social Media Icons
  • Coordinating Colors and Fonts Throughout
  • Custom About Me/Welcome Image
  • Total Install and Troubleshooting support FOREVER! Seriously. We don't want to leave anyone in a pickle. 
$35 Deposit will be required before any designs will be started - Paid through ETSY. 

If you have any questions about the process feel free to email us at lovinglifedesigns@gmail.com. 

Take a look at our most recent blog redesigns (Revision Fitness, Vegas Fitness and NutritionA Heart Willing to Follow and Michelle Morgan Photography) and you'll get a good idea of what you can expect from us. 

Thanks for Reading - Seriously take advantage of this service. We kind of ROCK! :)


Creative Commons License

July 23, 2014

The New and Improved
Loving Life Designs

For the past month or so, Michelle and I have been working A LOT in order to update/relaunch Loving Life Designs. We haven't been very active on the site for over a year and we are wanting to start working again. We both thought that a redesign/relaunch of the site and brand would help our activity (at least we are hoping it helps). A fresh start is always great.

We both really enjoyed our last look and thought we hit a home run with it. It was modern and fun and eye catching. We also thought that we would like the website look. Turns out we didn't.  Because of how the site was coded we couldn't preview posts and see mistakes that would be made which meant re-writing posts and updating after they had been published. I really HATED it. I can't say the same for Michelle.

With the redesign/relaunch of the site we are going to be offering some new services. We'll still offer our free designs and printables, but we'll also be opening two new shops.  A premium design and print shop. More information to follow on those two new services. We'll keep you updated.


Lets take a tour of the new look!

First thing we did was make it a traditional blog again.


Old Look


New Look


Like I said before we felt we hit a home run with our last relaunch so most of the elements and colors will remain the same. We did redesign the header.


The sidebar is a little different too. We made a new profile image, added slide show feeds to our Instagram pages,  created links to our design pages, and created some social media icons for our new twitter, instagram and pinterest pages.


What do you think?  It's always really scary to do a redesign. We think it's clean, modern and easy to navigate. We hope everyone likes it. Hopefully this new look will bring new life to our designs and light a fire under our rear ends.

Thanks for reading. Enjoy.


Creative Commons License

April 17, 2013

Revision Fitness Blog Redesign

After I finished Lindsey's blog a few weeks ago, Mindy, one of Lindsey's beachbody friends asked about a design for her site Revision Fitness. I was happy to design one for her.

Mindy wanted something similar to Vegas Fitness, Nutrition and Fashion - "Simple and to the point!" 

Mindy already had a header created all I needed to do was create the sites design and some blogger elements.

This was the final design we came up with.


I created several elements for her: 
  • A Meet Revision Fitness banner 
  • Stylized about me photos
  • Social Media Banners
  • A Join my Team beachbody image
  • CSS Stylizing of the search and submit buttons for the search and follow by email widgets.


Using my handy dandy HTML and CSS skills I also created a center aligned navigation bar. With a border on top and bottom to distinguish it from the rest of the page. 


And last but not least using the magic of Snap Widget I made two Instagram widgets. A gallery style banner at the top of the post section and a slideshow in the sidebar. 


Go and take a look. Mindy and Chris have an amazing story and are awesome at motivating their readers and were amazing clients to work with. Thank you Mindy and Chris.  

If you would like a blog design email me at lovinglifedesigns@gmail.com.

Creative Commons License

March 6, 2013

Vegas Fitness & Nutrition Blog Redesign

A few weeks ago my sister in law, Lindsey, posted on facebook that she was wanting a new design for her fitness blog, Vegas Fitness and Nutrition and she didn't know what to do. Naturally, I offered to help.

She didn't want anything too fancy. Just simple and to the point. She showed me a few fitness blogs to use as inspiration and then we were off.

I first designed a new header for her. It went through a couple revisions and this is where we landed.


Next I created some custom blog elements for her. I built her a new about me graphic, a join my beach body team graphic, a what am I doing widget graphic and a buy Shakeology now graphic link. Michelle built the social media icons and the go icons for the blogger search widget and the follow by email widget. *Tutorials on how to implement that on your blog later.


I also coded custom HTML for her recipes. All she needs to do is post the HTML to the blog post, input the new recipe information and publish the post.  I think it makes the recipe stand out from the post and makes it easier to find and read.


This is the final look we came up with. I think my favorite part is the blue striped background. I think it creates just enough class and elegance and is not over bearing like some backgrounds can be.


Well Lindsey, I hope you love your new look. I certainly had fun creating it and working with you.

What do you think?